Search on TFTC
Coldcard Q: A Beginner's Guide to Setting Up and Using Your Hardware Wallet

Coldcard Q: A Beginner's Guide to Setting Up and Using Your Hardware Wallet

Mar 4, 2024
Bitcoin Basics

Coldcard Q: A Beginner's Guide to Setting Up and Using Your Hardware Wallet

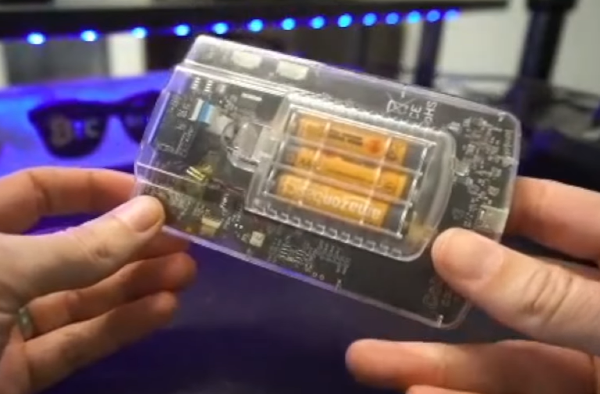
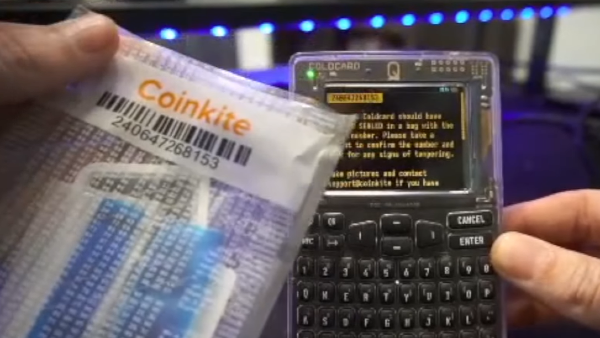
The Coldcard Q is a hardware wallet designed to secure your Bitcoin offline. It's the latest iteration from Coinkite, known for its range of Bitcoin security products. The purpose of this tutorial, based on a video by BTC Sessions, is to guide beginners through the setup and use of the Coldcard Q, including conducting transactions and practicing recovery procedures.

Prerequisites

Before proceeding with this tutorial, a basic understanding of Bitcoin and where to acquire it is beneficial. Familiarity with Bitcoin transactions and wallets like Sparrow Wallet will be an asset but is not mandatory.

Understanding the Coldcard Q

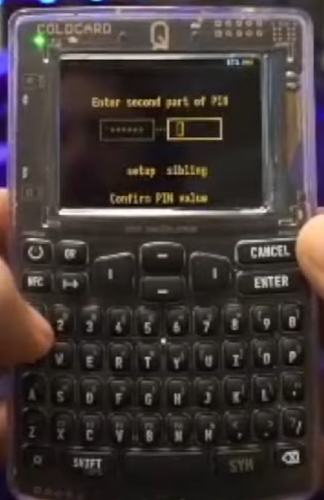
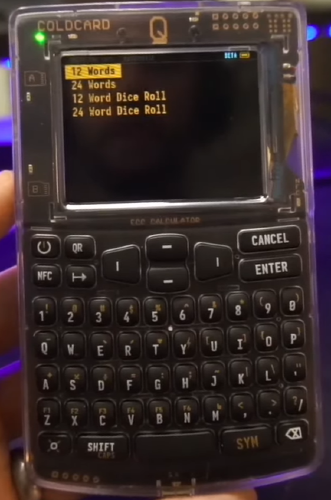
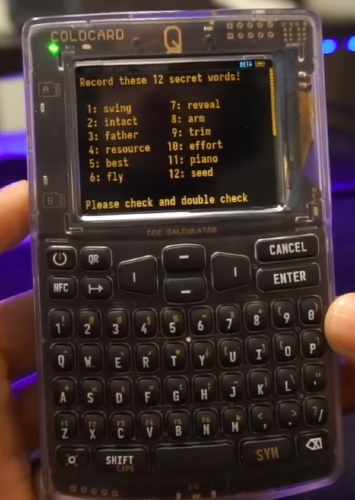
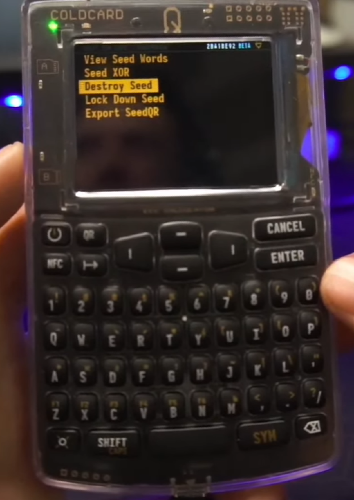
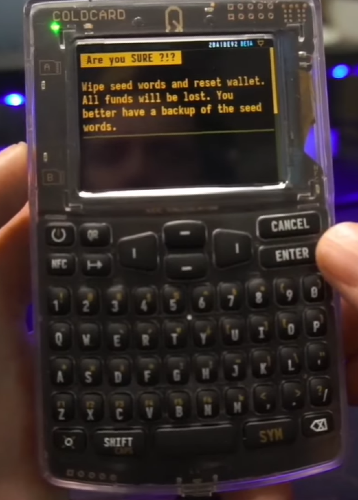
A hardware wallet like the Coldcard Q holds the keys to your Bitcoin in a secure, offline environment. When you perform transactions, the device signs them without exposing your keys to an internet-connected device. If your Coldcard Q is lost, stolen, or damaged, your Bitcoin is still safe. During setup, you will receive a backup in the form of a seed phrase, which consists of 12 or 24 English words. This phrase is a backup key to your funds and should be stored securely and physically, separate from the device.

Setting Up the Coldcard Q

  1. Power on your Coldcard Q by pressing the power button after inserting three AA batteries or connecting it via USB-C.
  1. Accept the terms and confirm the bag number matches what's on your device.
  1. Choose a PIN code for your device, which includes a prefix and suffix separated by anti-phishing words.
  1. Create your seed phrase by selecting 'New Seed Words' from the main menu, choosing between 12 and 24 words.
  1. Write down the seed words on paper or etch them into a metal backup. Double-check and confirm the words with the device.
  1. Enable the USB function under 'Settings' > 'Hardware On/Off' to prepare for connection to a computer.

Using Sparrow Wallet with Coldcard Q

  1. Download Sparrow Wallet from the official website and install it on your computer.
  1. Plug in your Coldcard Q to your computer via USB-C.
  1. Configure Sparrow Wallet to connect to a public server under 'Settings' for network connectivity.

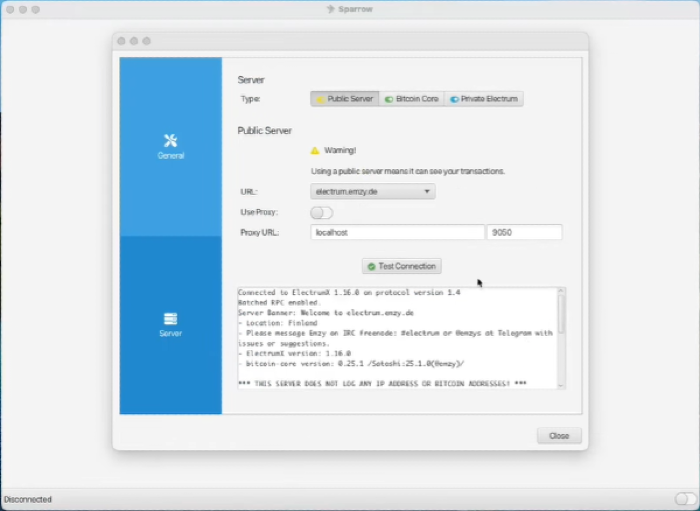
After selecting a public server, click 'Test Connection.' If the test is successful, click close.

  1. Open Sparrow Wallet and create a new wallet by connecting your Coldcard Q.

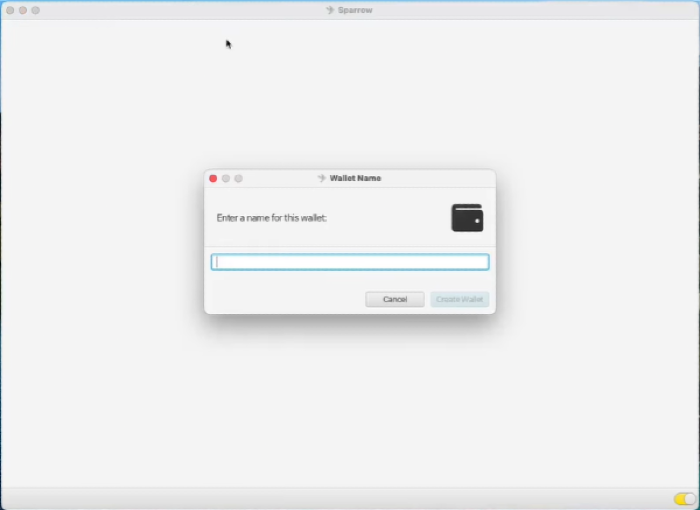
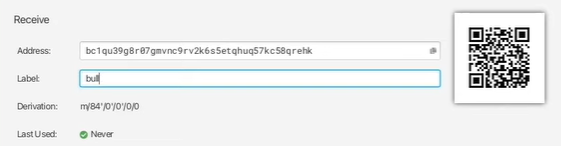
Name your new wallet.

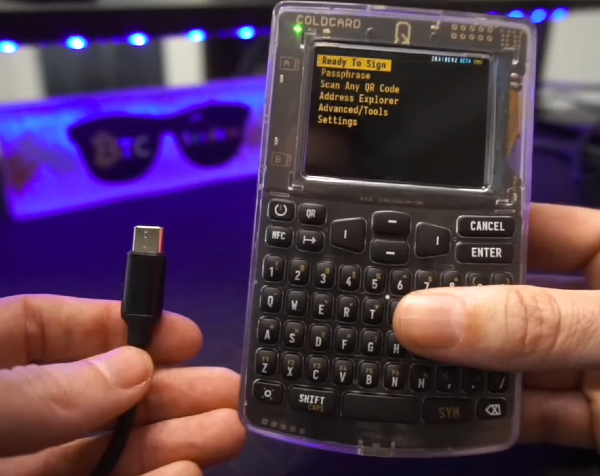
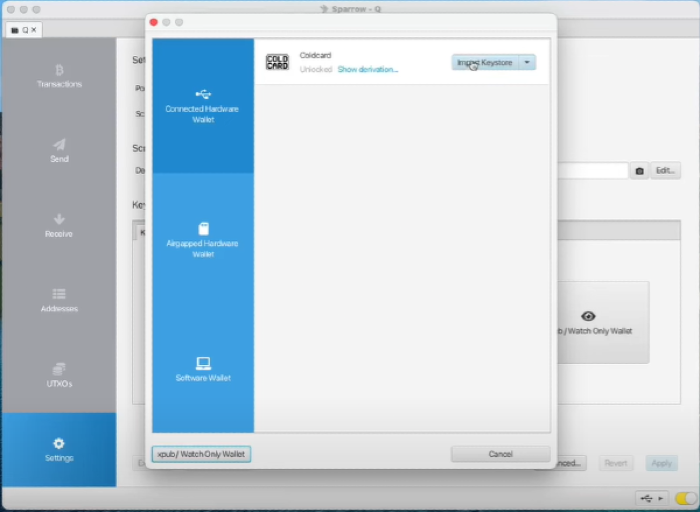
Select 'Connected Hardware Wallet.'

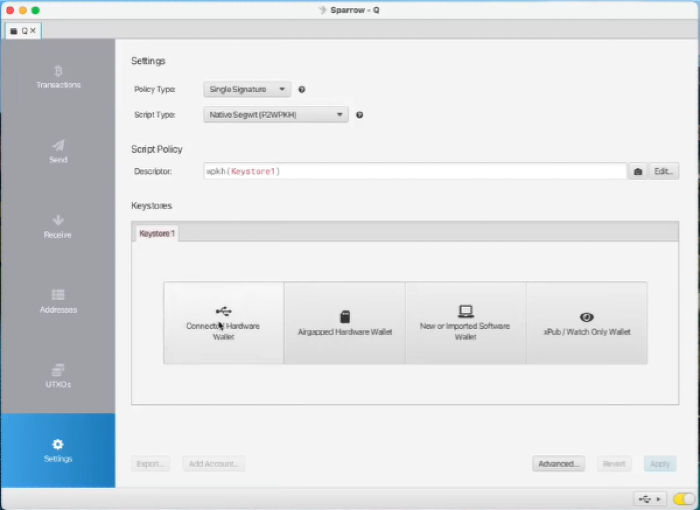
With your Coldcard plugged in, select 'Import Keystore.'

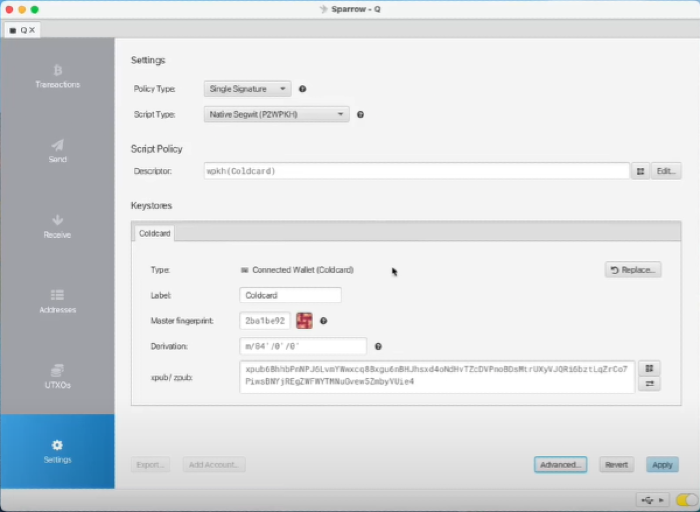
Review the settings, then click 'Apply.'

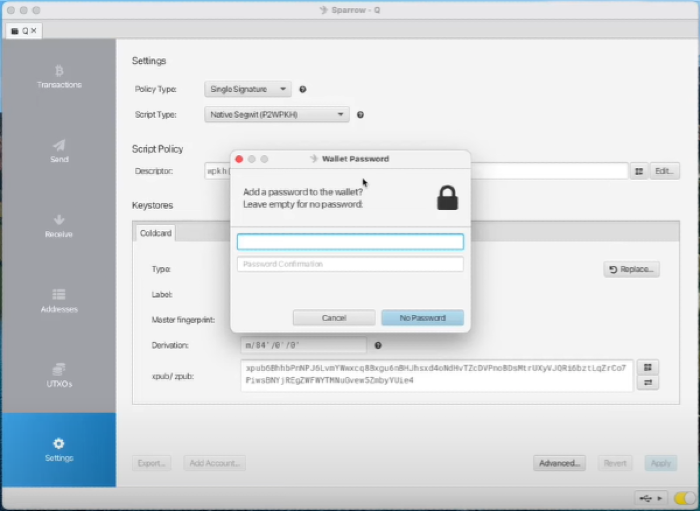
Add a password to your wallet.

Receiving Bitcoin

  1. Go to the 'Receive' tab in Sparrow Wallet.
  1. Copy the displayed address or use the QR code to receive funds from an exchange or other wallet.
  2. Label the transaction for your records.
  1. Wait for the transaction to appear in the 'Transactions' tab as confirmed.

Sending Bitcoin

  1. Navigate to the 'Send' tab in Sparrow Wallet.
  1. Enter the recipient's address, label the transaction, and specify the amount.
  1. Adjust the transaction fee based on priority.
  1. Create and finalize the transaction.
  1. Enter your PIN on your Coldcard, select 'Ready To Sign' and confirm the transaction details.

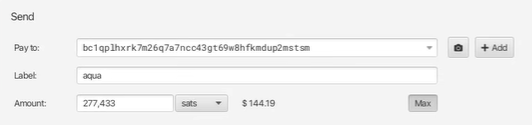
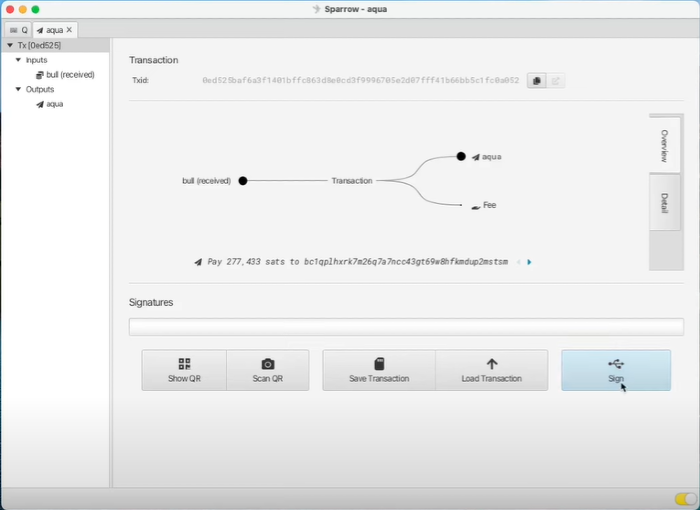
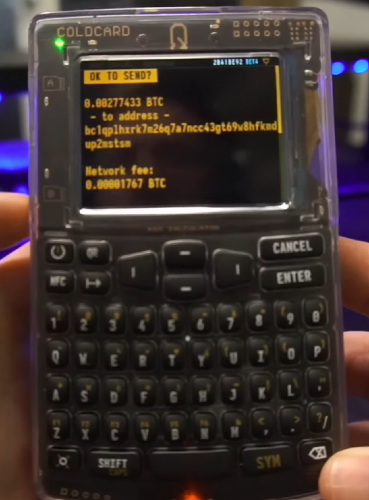
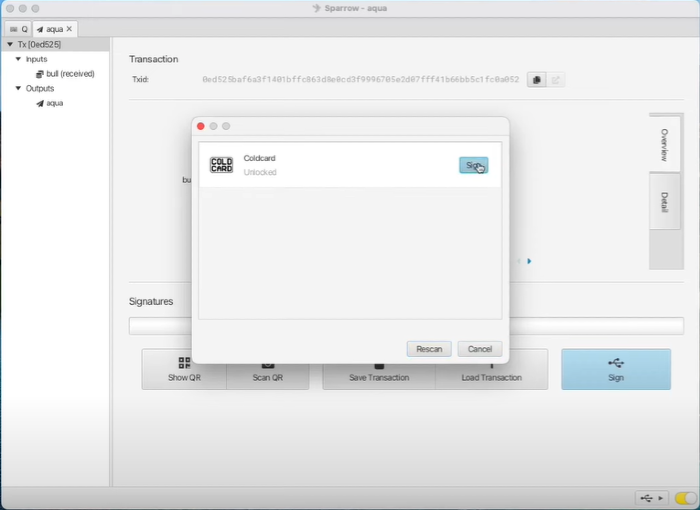
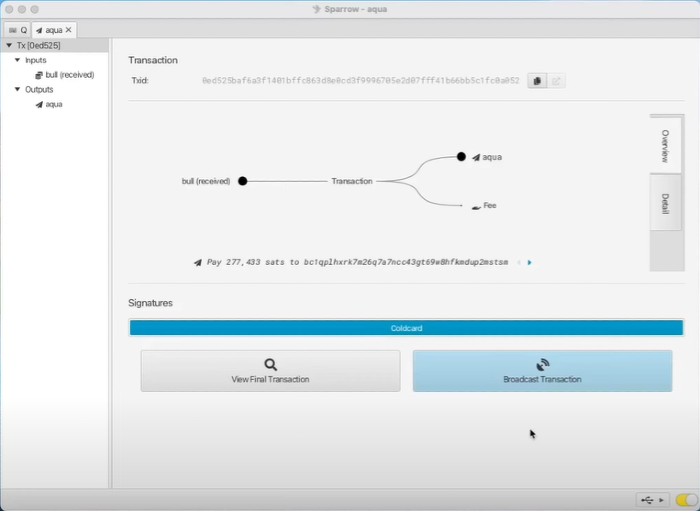
After confirming the transaction details on your Coldcard, click 'Sign' on Sparrow Wallet.

  1. Broadcast the transaction to the Bitcoin network.

Practicing Recovery

  1. In the Coldcard Q, go to 'Advanced Tools' > 'Danger Zone' > 'Seed Functions' > 'Destroy Seed' to wipe the current seed.
  1. Confirm the destruction of the seed and reset the device.
  1. Re-import the seed by selecting 'Import Existing' and entering your previously recorded seed words.
  1. Re-enable USB functionality as before.
  2. In Sparrow Wallet, create a new wallet and import the keystore from the Coldcard Q to regain access to your funds.

Final Thoughts

The Coldcard Q, while advanced, can be utilized straightforwardly for secure Bitcoin storage and transactions. The tutorial covered the setup, receiving and sending transactions, and the recovery process, ensuring you have the knowledge to confidently manage your Bitcoin security practices.

Current
Price

Current Block Height

Current Mempool Size

Current Difficulty

Subscribe